-
 Mike Langieri
2I'm a retired Industrial Designer and I'm working with James Alecea, owner of Unlimited Creations in East Hartford, CT on my 1969 Camaro interior do-over. I've done some other interior design work on a custom console design for a Ford SVT Lightning and also designed unique tribal ghost flame patterns for the exterior. I've also done custom underhood graphic designs for cars and trucks and custom banners for Facebook Automotive Groups. I'm new to this forum so please forgive me if I'm posting in the wrong spot. Feel free to move it if necessary.
Mike Langieri
2I'm a retired Industrial Designer and I'm working with James Alecea, owner of Unlimited Creations in East Hartford, CT on my 1969 Camaro interior do-over. I've done some other interior design work on a custom console design for a Ford SVT Lightning and also designed unique tribal ghost flame patterns for the exterior. I've also done custom underhood graphic designs for cars and trucks and custom banners for Facebook Automotive Groups. I'm new to this forum so please forgive me if I'm posting in the wrong spot. Feel free to move it if necessary.

The car was already a multiple show winner here in New England, and that was with the stock (re-covered) interior. The seats in the 1st Generation Camaros are not very supportive at all. We're using front donor buckets from a 2000 Pontiac Trans Am which have power adjustments for the drivers side and power lumbar for both driver & passenger. The lower side bolsters really hug your thighs, and the adjustable back side bolsters keep your body in place as well as any Recaro. The car was restored with a LeMans Blue exterior and white interior and the white interior has proven to be somewhat of a show stopper as almost every Camaro has some kind of black interior often mis-matched. The dash and console are black and carbon fiber with custom gauges from SpeedHut. So the interior will remain predominantly white with the black dash, carpet, seat backs, and kick panels. Albright's supplied the Snow White material that's being used for the seats and door panels.

This is/was the original interior.

These are the donor seats. Extremely comfortable and very adjustable when the 12v power mechanisms are hooked up. The rear frame/floor mount tabs will need to be slightly modified to line up with the Camaro rear pattern.

This is a photoshop rendering of what the front buckets will look like when completed. The inserts are perforated and will be sewn with a light grey thread. The French seams will be done with a blue thread that just about matches the color of the car.

Here's my pattern rendering which was also created in Photoshop. In this rendering I used a blue "stitch" look and decided it might too strong in the insert area.

James was kind enough to put together a quick sample patch showing the blue, white and grey options for the hex outline and also the blue on white French seam. These were done in a matter of minutes and I realize that, it was just to give us a sense of the color.

Another photoshop effort to show the rear seat being reinterpreted to match the front buckets. Of course a bit of foam work is being done to get the definition. And in both front and back, a classic chevy bowtie is being embroidered on the backs, a blue center, black outline framed with a "chrome" thread border.

The car has the standard interior so we'll re-use the door cards and I've integrated a slightly raised panel in the shape of the infamous 1969 "Hockey" stripe which this car has on the outside front fenders and doors. And of course, there'll be an insert of the same hex pattern in the front/rear panels. I used the Hog Ring Camaro sketch sheet to work up the design with a bunch of pictures correctly sized to adjust to the template.
So that's the design exercise on my part. I will certainly follow up with pictures once the interior is completed. -
 Bob Stephens
0I'm not big on logo's on upholstery as everyone knows what kind of vehicle it is; but love the renderings. If the interior comes out as good it's going to look incredible.
Bob Stephens
0I'm not big on logo's on upholstery as everyone knows what kind of vehicle it is; but love the renderings. If the interior comes out as good it's going to look incredible. -
Mike Langieri
2Thanks for the props Bob... I'm hoping it turns out great as well. I opted for the small chevy bowtie only because its blue LOL. James has the pattern on his Brother machine, hopefully we can scale it to 2-1/4" wide. I don't know if its infinitely scaleable there might be pre-programmed sizes so we'll do a test sample. He's done some cars with LED beads and I am tempted to outline that "Hockey" stripe section with a blue LED and have that go on when the doors are opened. There's no electricity in the doors right now but I did get the OEM rubber boots that allow wiring to pass through to the doors from the fender bulkhead. Not going with power windows at this time its a big project, but I do have a set of power bullet style mirrors that I might adapt (need some bodywork). I'll post up pix when its all done.-Mike
-
 Justin L Rash
9I’ll have to agree. Your rendering with the software you’re using looks great. I think It’ll turn out the way you’ve envisioned for sure.
Justin L Rash
9I’ll have to agree. Your rendering with the software you’re using looks great. I think It’ll turn out the way you’ve envisioned for sure.
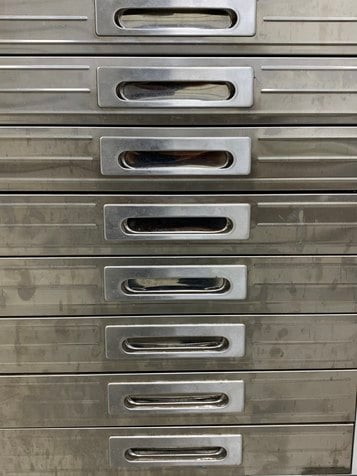
For future inspiration I always look to my environment…
Plus the lines and shapes on said project. You’d be surprised what original ideas you can come up with…

-
Mike Langieri
2The job is in progress... did some additional sketches to kill time. The 1st shot shows the original seat that's being re-done to get the new contours. Second shot is just an exercise in Photoshop rendering.
[img]http://
[img]http://
-
Mike Langieri
2Just an update on this project... the seats turned out pretty much as planned.

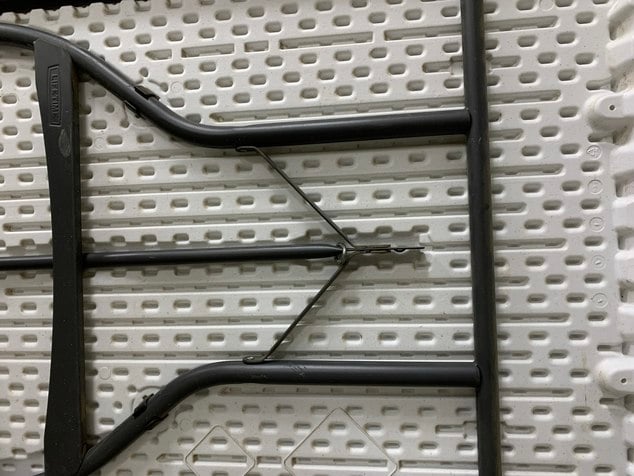
Had to modify the seat rails a bit to retrofit the Pontiac Trans Am donors. Drivers side was minor cutting and re-drilling of the rear mounting holes. The passenger side was much more involved, had to fabricate new rear legs in steel, weld them up, and then cut old rears off and weld the new legs on. I wanted to make sure that the seats actually bolted up to the original F-Body floor pan mounts for safety's sake.

Fabricated cardboard legs to get size and position then transferred design to 1/8" steel. Also built a wooden jig to ensure that the seat rails were parallel and level wile I was fabricating the mounts.

The door panels didn't come out as nice as the seats. I'm going to have to find someone local to the Springfield, MA area that I can work with to re-do the door panels. The shop was a bit of a drive and I couldn't stay on top of the project. They double layered the original door panels when I thought they would use new cards so everything got too puffy and thick. Aside from the thickness problem they look OK at a glance but closer inspection showed seams mismatched by over an inch from to rear panels.


Welcome to The Hog Ring!
This forum is only for auto upholstery pros, apprentices and students. Join today to start chatting.
More Discussions


- Terms of Service
- Useful Hints and Tips
- Sign In
- Created with PlushForums
- © 2026 The Hog Ring